Important Notice
[2026-10-02] New Service: Passwordless Single-Sign-On (SSO) A Simpler, Faster and More Secure Way to Your IT Services (Staff & Student)
[2026-10-09] Scheduled Maintenance: Human Capital Management (HCM) System (Staff Only)
[2026-10-14] Maintenance Notice: Campus Wired and Wi-Fi Network Maintenance in Oct & Nov 2026 (Staff & Student)
Secure Remote Access Service

Overview
Secure Remote Access Service (For Administrative Staff)
The Secure Remote Access Service (“The SASE Service”) is a modern security channel that provides users with an enhanced remote access experience, ensuring secure and efficient connections to the University's sensitive IT services, systems and data—anytime, anywhere.
Key benefits of SASE
Enhanced Security and Accessibility with Ease
The SASE service facilitates remote access to sensitive data in intranet office backend systems with enhanced user experience by adopting the "Zero Trust" security principle: "Never trust, always verify". It checks your identity (SSOid) and the device's explicit permission for every single access and action taken to enhance the protection.
How SASE help me? A New Way to Connect...
SASE simplifies how you connect to the Supported IT Services/Applications and sensitive data you need. It provides a single, secure gateway to all university resources.
What this means for you:
Universal Access: Reach internal websites and restricted systems from any location, e.g. stationed at "Open Office" or from your home.
Seamless File Management: Access your network folders and shared drives off-campus.
Flexible Printing: Print to your office network printers from anywhere. *
* Please contact ITO for configuration arrangement
Type of Devices Officially Support:
| Laptop or Desktop PC models purchased under PC or Laptop Tender with FO | Others * | |||
| Type of Device | Domain-joined Windows Device | Standalone Windows Device | Mac OS Device | |
| Official Support | Yes | Yes | No | No |
* Including the non-standard laptop/PC models owned by the University/Department Units/Research Projects/Centres, or any personally owned laptops/PCs.
Windows Client
macOS Client
iPadOS Client
We will continuously expand the service by increasing the number of intranet/restricted IT services supported by SASE.
The initial launch will include access to, but is not limited to, the following:
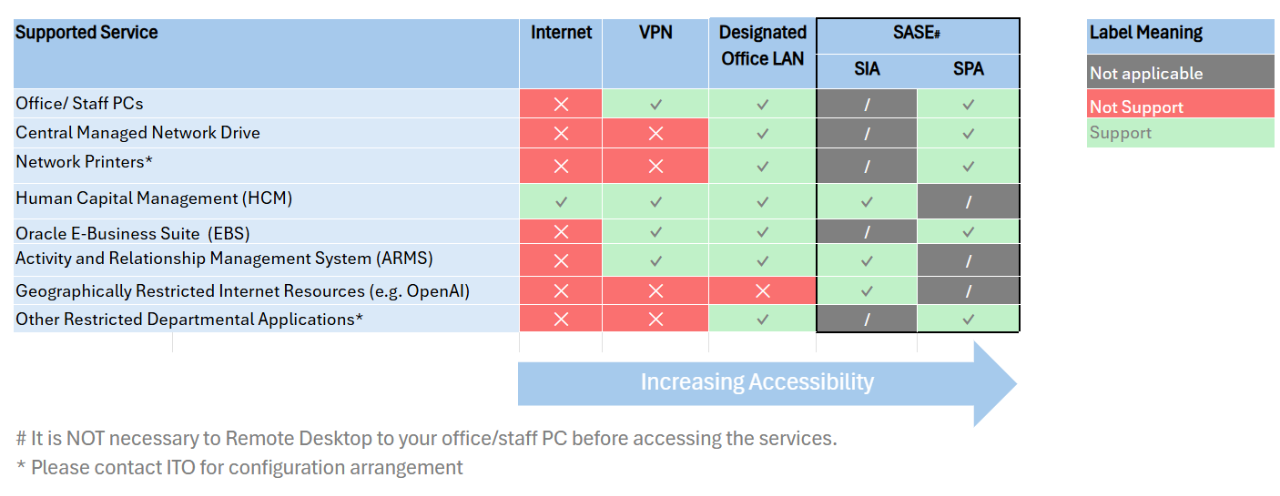
SIA (Secure Internet Access/ AnyConnect VPN) and SPA (Secure Private Access/ Zero Trust Access)
It depends on the resources you need to access.
SIA is used to connect to Restricted Internet Cloud Service including but not limited to Human Capital Management (HCM), Activity and Relationship Management System (ARMS) and Geographically Restricted Internet Resources (e.g. OpenAI)
SPA is used to connect to Restricted Intranet Service including but not limited to Office/ Staff PCs, Central Managed Network Drives, Oracle E-Business Suite (EBS), Network Printers* and Restricted Departmental Applications*.
If not sure, connect/ enroll to both SIA and SPA or refer to Supported IT Services/Applications for more details
* Please contact ITO for configuration arrangement
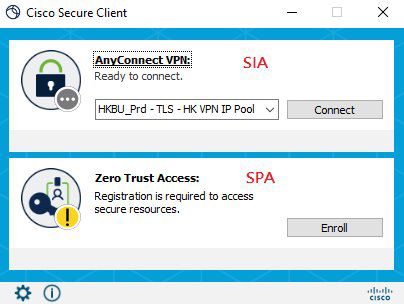
You will be automatically logged out of SIA & SPA after 24 hours and will need to reauthenticate to continue using these services.
It is a best practice to disconnect from / unenroll from SIA & SPA manually once finish using.
This could be caused by a network issue. If you are on campus, please make sure you are connected to one of the following Wi-Fi networks:
- BU-Standard
- BU-Advanced
If you are already connected to one of these networks and still experience issues, try restarting your device or contact ITO for further assistance.
Please refer to the Supported IT Services/Applications to check if the resource is currently supported by SASE.
For access to other restricted departmental applications, kindly contact ITO for configuration arrangement.
The Campus LAN will take priority, and your network traffic will bypass SASE service.
Please enter the full path of the network drive (eg. \\xxx.hkbuad.local\xxx).
- Make sure you have the access right to the drive
- If you are off campus, make sure you are connected through the SASE service before attempting to map the drive.
- If you continue to have issues, please contact ITO for assistance.
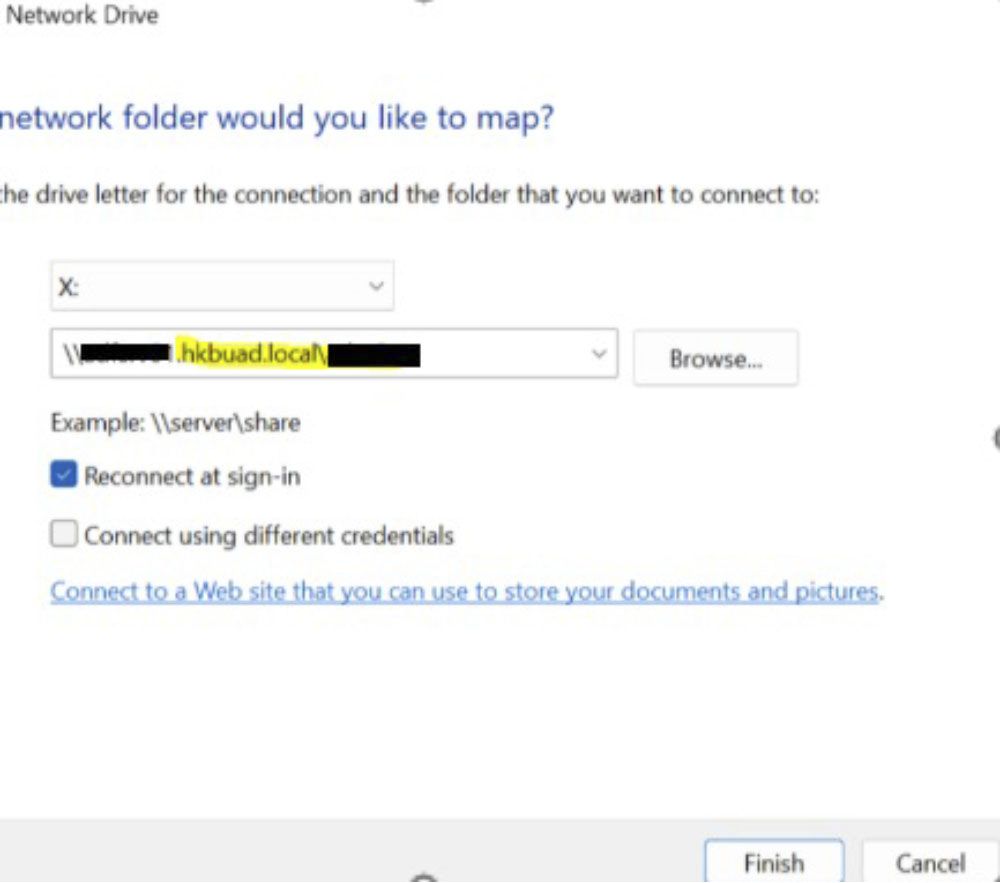
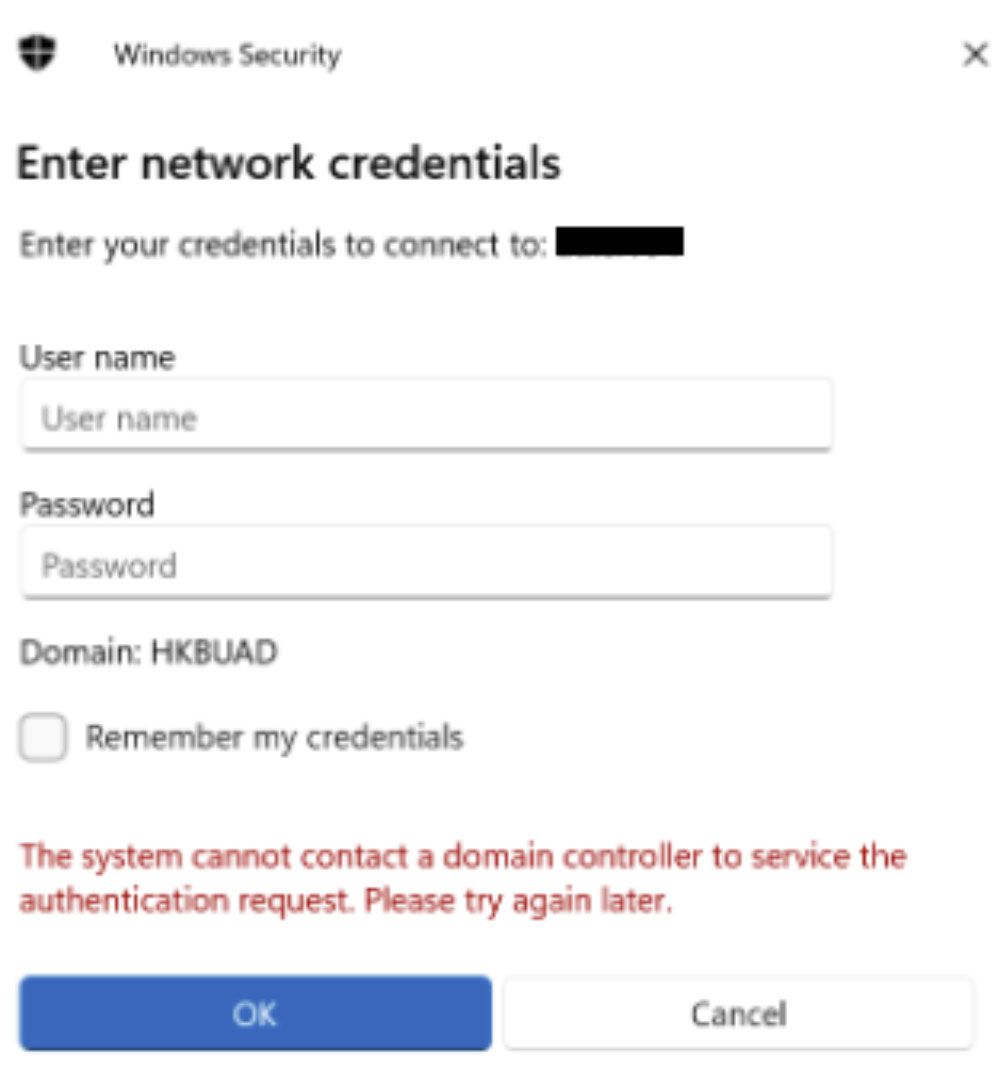
You can ignore this error message. Please try logging in with your credentials again; you should then be able to access the network drive.
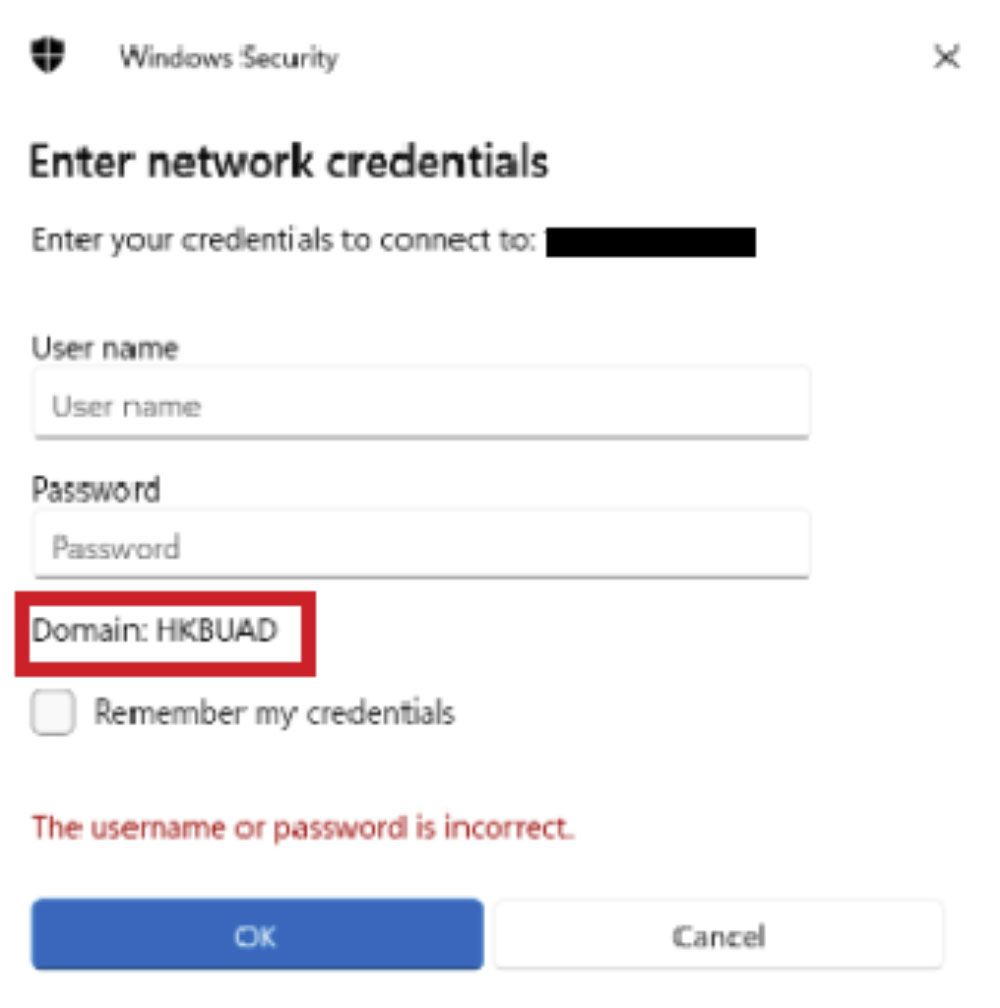
Please verify that you have entered the correct username and password. Also, ensure that the domain is set to HKBUAD. If it is not, enter your username in the format HKBUAD\username
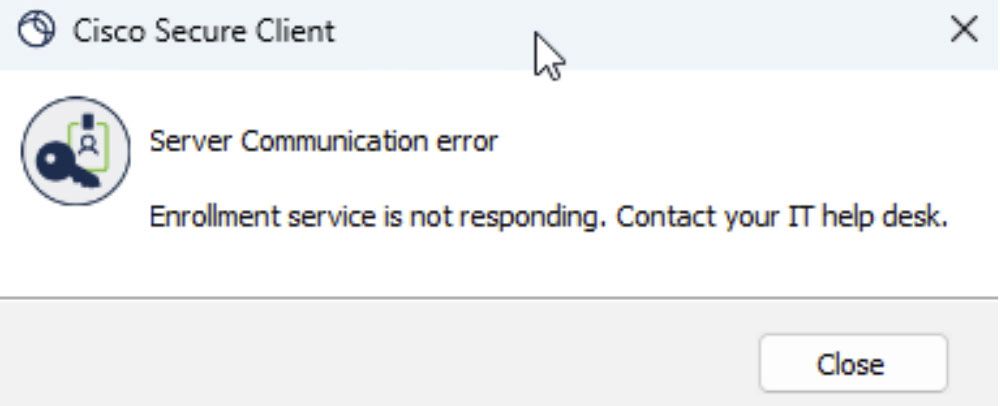
Please restart your computer and try again. If you are on campus, make sure you are connected to either the BU-Standard or BU-Advanced Wi-Fi networks. If the issue persists, contact ITO for further assistance.
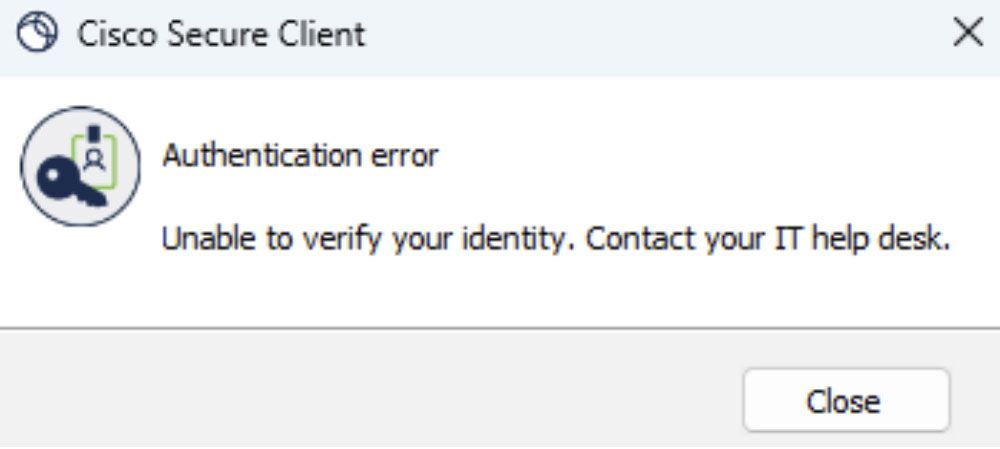
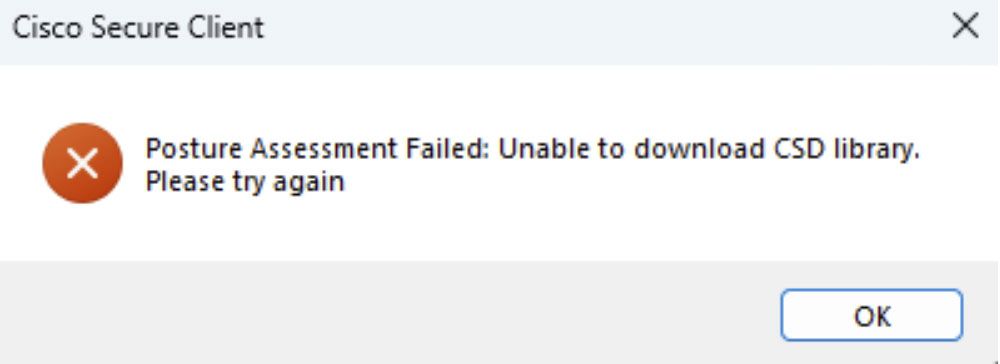
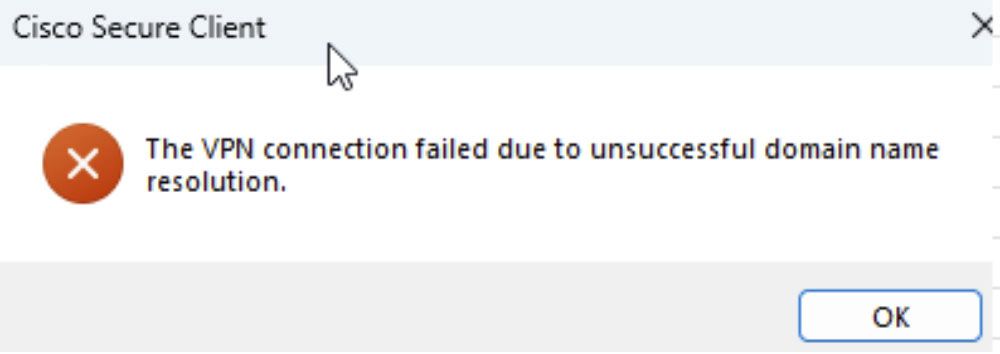
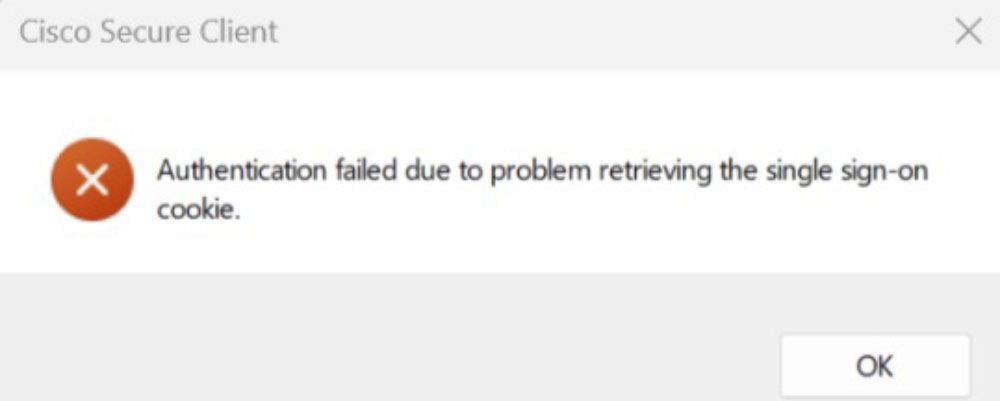
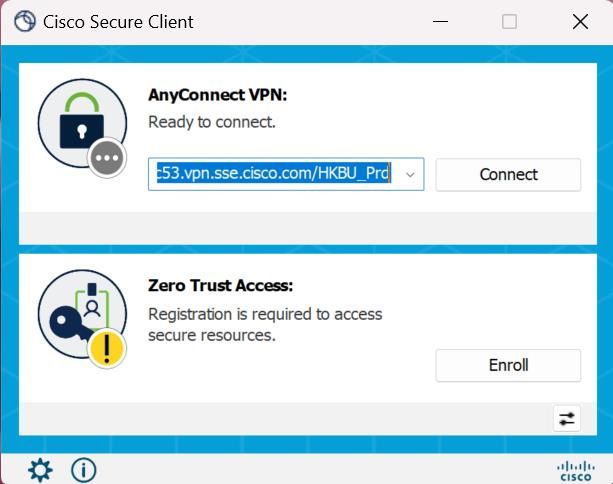
If your profile option missing in SIA:
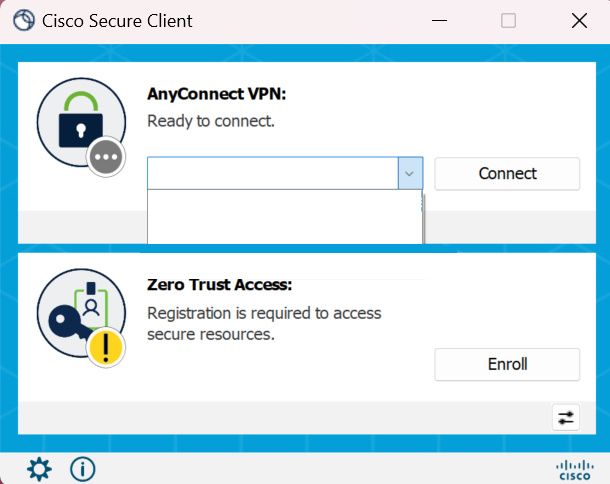
- Click the connection profile drop-down box.
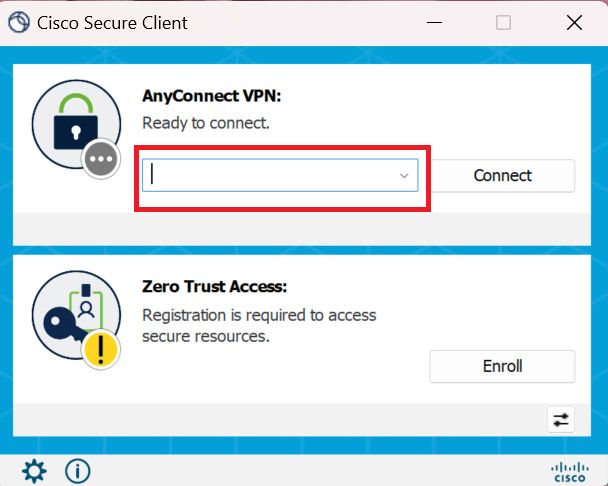
Manually enter ap-east-1-5c53.vpn.sse.cisco.com/HKBU_Prd to connect using the HK IP address
OR
Manually enter ap-southeast-1-5c53.vpn.sse.cisco.com/HKBU_Prd to connect using Singapore IP address for accessing geographically restricted cloud services
Posture Checking
It typically takes around 10-15 minutes for the system to re-evaluate your device. If you want to trigger the posture check immediately, you can manually unenroll and then re-enroll your device. For instructions on how to unenroll, please refer to the installation guide.
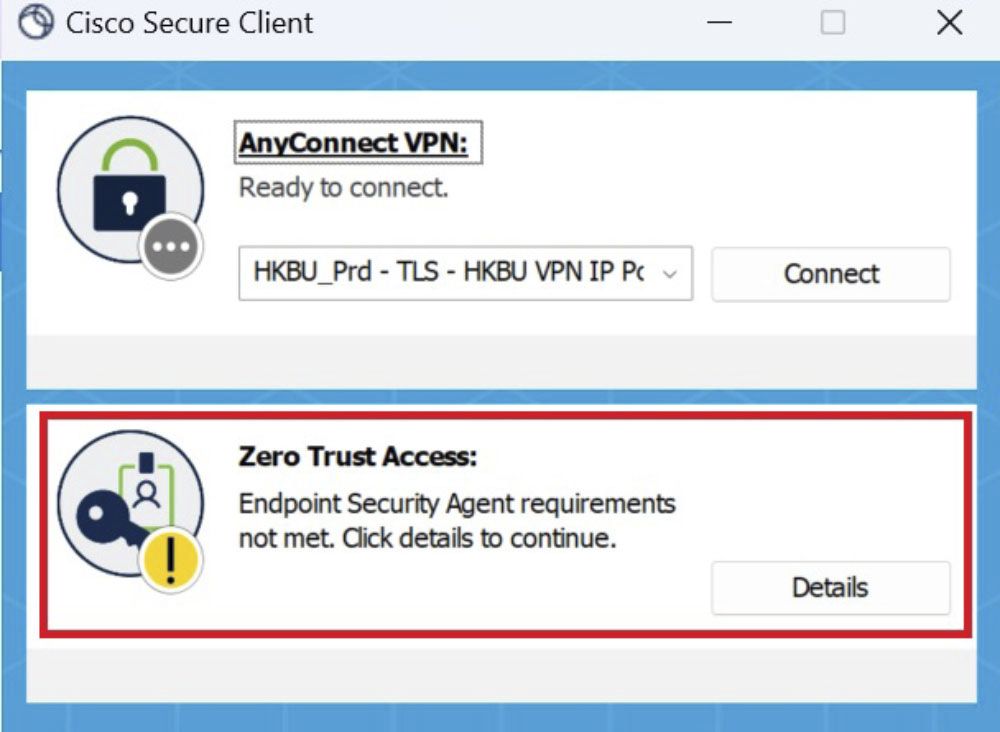
You may have installed multiple endpoint security agents, some of which may not be supported by the solution. Please uninstall any unsupported security agents (refer to the device pre-requisites of installation guide).
If you have installed ESET Endpoint Security, please refer to the steps below to uninstall it from Windows or macOS devices:
1. Uninstall ESET (for Windows users):
- Search for “Add or remove programs” in the search box.
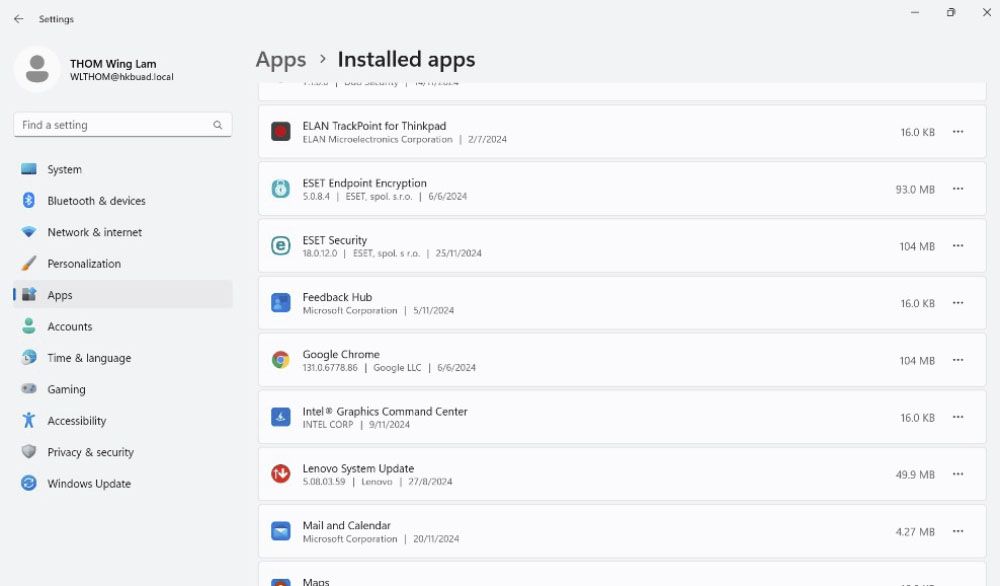
- Locate ESET Security in the list.
- Click the ‘…’ icon and select Modify.
- Click ‘Next’.
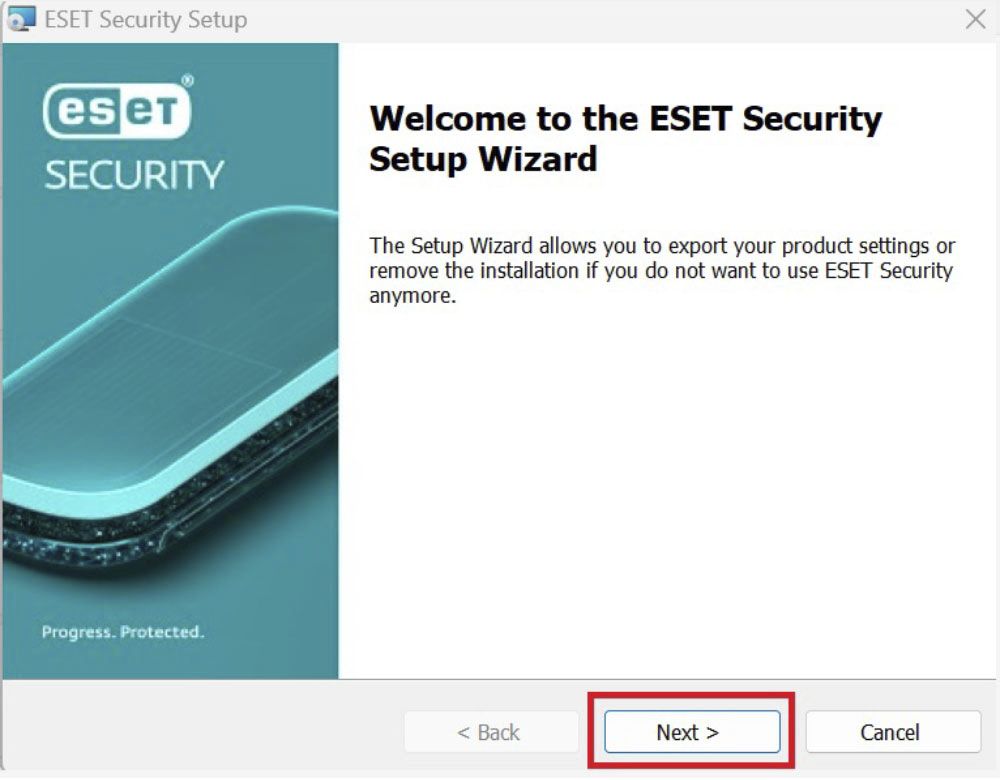
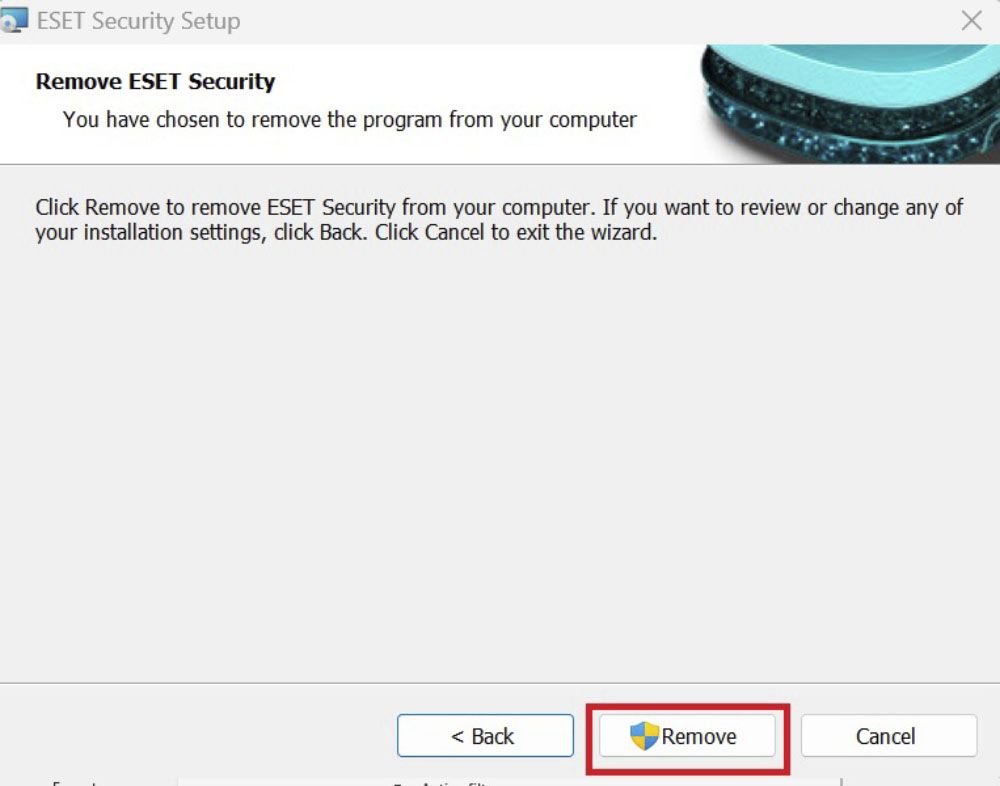
- Select ‘Remove’.
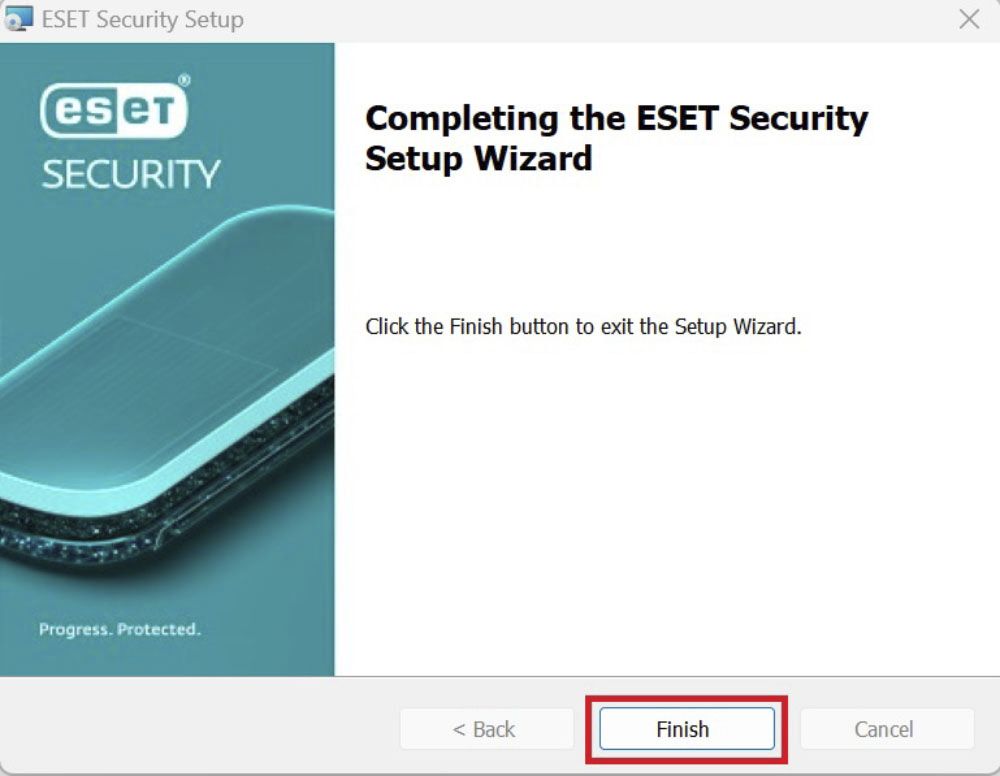
- Click ‘Finish’.
2. Uninstall ESET (for macOS users):
- Open Finder and go to the Applications folder.
- Locate the ESET Endpoint Security application.
- Right-click on the application and select ‘Move to Trash’.
- Empty the Trash to complete the uninstallation.
3. Restart your computer
4. Manually unenroll
Third-party security firewall may take over native firewall, so you fail the posture checking. To fix the issue, please follow the steps below:
1. Disable the Third-Party Firewall:
- Open the third-party firewall application.
- Look for the option to disable or turn off the firewall, usually found in the settings or preferences menu.
- Confirm that the third-party firewall is disabled.
2. Enable Windows Firewall (for Windows users):
- Navigate to Control Panel > Windows Defender Firewall > Turn Windows Defender Firewall on.
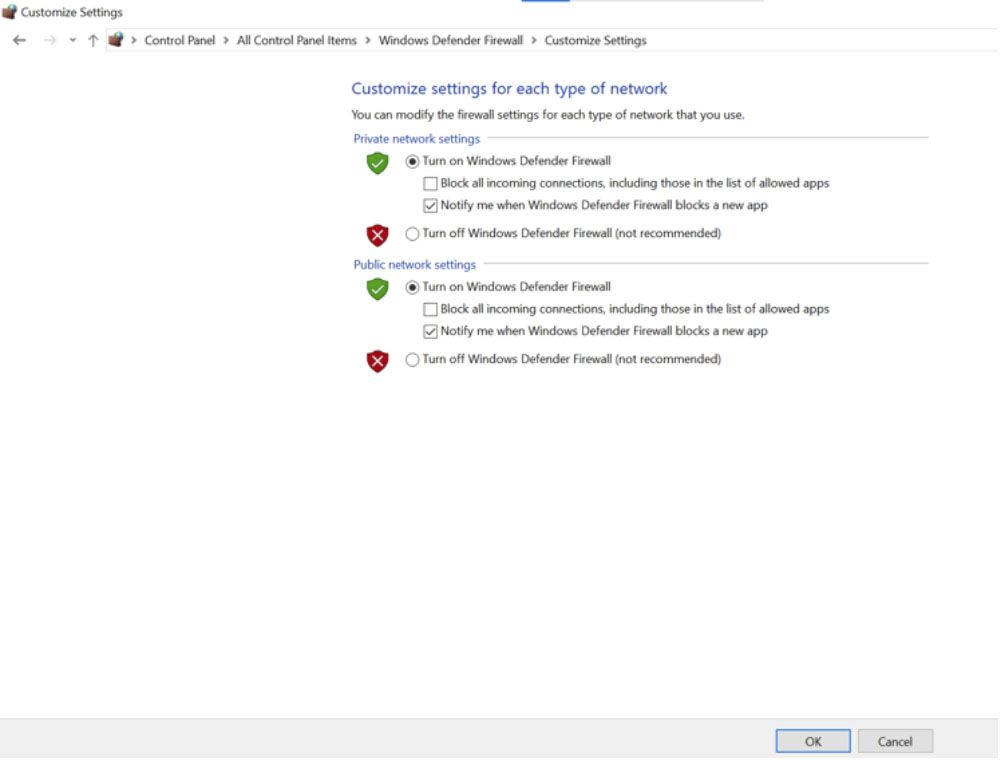
- Ensure that Windows Firewall is turned on for both private and public networks.
3. Enable Mac Firewall (for Mac users):
- Go to System Preferences > Security & Privacy.
- Click on the Firewall tab.
- If the firewall is off, click ‘Turn firewall on or off’
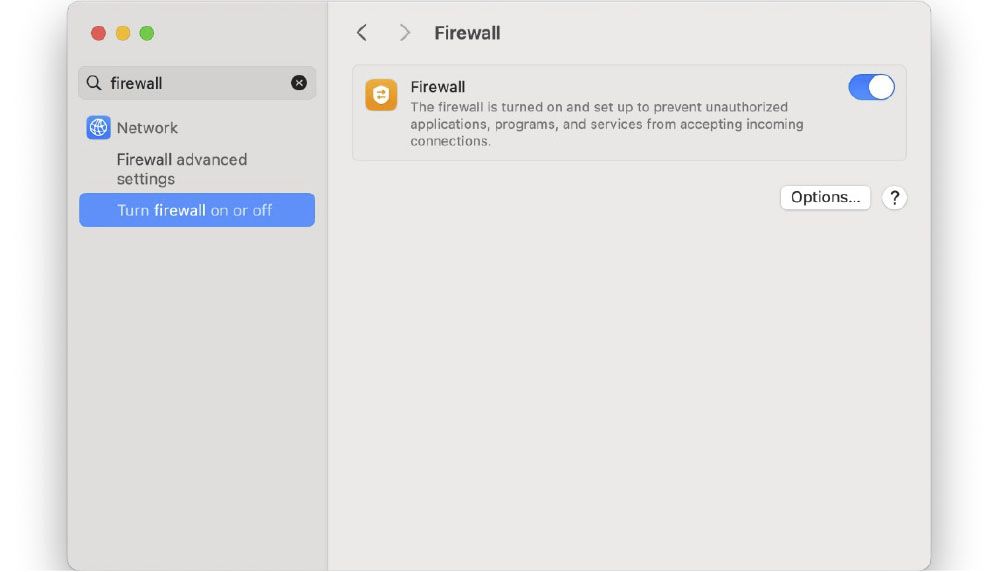
- You can also click ‘Firewall Options’ to customize settings if needed.
4. Restart Your Computer:
- After making these changes, restart your computer to ensure all settings are applied correctly.
Miscellaneous
Cisco Secure Client does not support multiple user sessions. Before signing out or switching to another user account, please disconnect from/ unenroll from the SIA/ SPA. This helps prevent you SASE account from being locked.
Yes, however, Cisco Secure Client is supported only on iPads; other mobile devices are not supported.
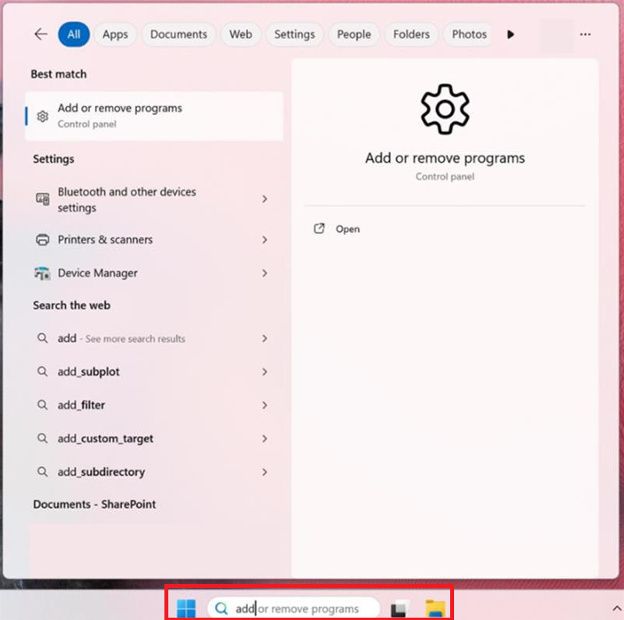
Type “Add or remove programs” in the Windows search bar and open the application.
Search for “Cisco” in the list of installed programs and uninstall the following five applications.
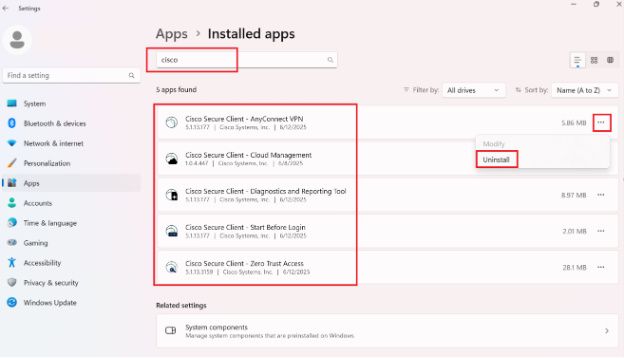
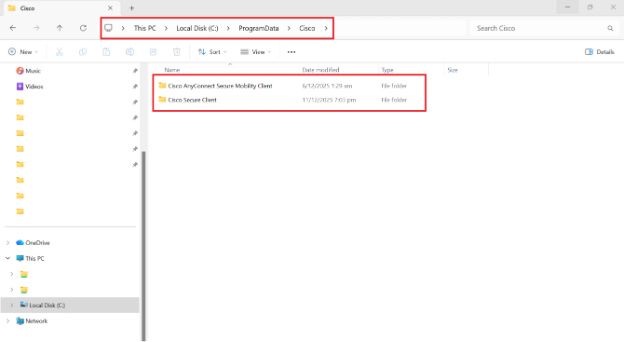
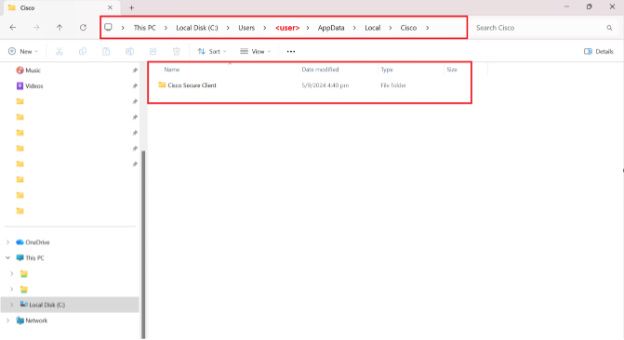
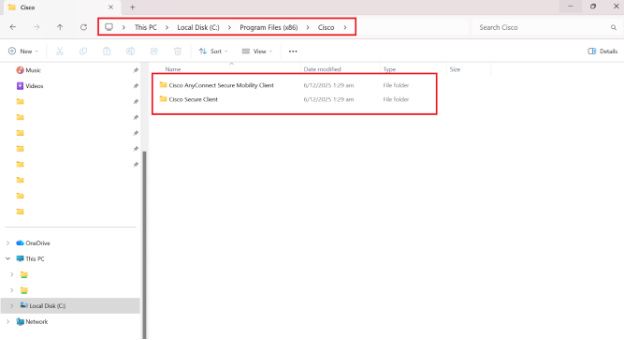
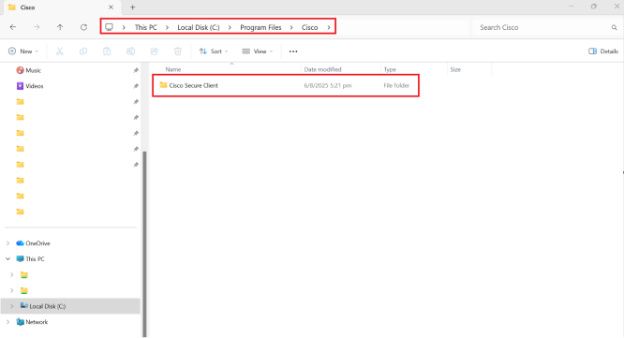
After uninstalling, manually remove the leftover folders at the following locations:
C:\ProgramData\Cisco
C:\Users\<user>\AppData\Local\Cisco
C:\Program Files (x86)\Cisco
C:\Program Files\Cisco\Cisco Secure Client
Free of Charge
Building a Secure Digital Future: Essential Tools for Information Protection

Briefing Session I on Secure Remote Access Service
The Secure Remote Access Service (“The SASE Service”) is a modern security channel that provides users with an enhanced remote access experience, ensuring secure and efficient connections to the University's sensitive IT services, systems and data—anytime, anywhere.
This briefing session will introduce you to this new service and guide you on its use, which will cover the following topics:
- An overview of key features and benefits.
- A step-by-step guide to getting started.
 | 10 October 2025 (Fri) |
 | 3:00 pm – 4:00 pm |
 | Online |
 | Cantonese |
 | Staff |
 | Training Deck |
 | Training Video |
Briefing Session II on Secure Remote Access Service
The Secure Remote Access Service (“The SASE Service”) is a modern security channel that provides users with an enhanced remote access experience, ensuring secure and efficient connections to the University's sensitive IT services, systems and data—anytime, anywhere.
This briefing session will introduce you to this new service and guide you on its use, which will cover the following topics:
- An overview of key features and benefits.
- A step-by-step guide to getting started.
| 13 October 2025 (Mon) |
| 3:00 pm – 4:00 pm |
| Online |
| English |
| Staff |
| Training Deck |
| Training Video |